
One of the best ways to grow your business is by acquiring new business. However, new business could take a lot of effort to get! Another way is to grow your existing business by offering new products and packages. Then there's an often-overlooked aspect of Churn which, at the very least, stands to maintain your business if you can get them to keep spending and at best grow your business with new opportunities. Our Account Growth workflow aims to help you and your sales team with understanding the plan for an Account before getting to the deal whether you plan to Grow, Maintain, or Churn that existing business as well as acquiring new business through prospecting.
To start using the Account Growth workflow:
1. From your home page, locate an empty data card slot and select + Define this card to add "Account Growth".
- We have added both quarter and year information to provide additional information to the user.

2. Once the Data Card is added, click on the the data card to be taken to the expanded view which is your worksheet for setting the Growth Classifications.
3. Once you are done with the view and wish to get back to your Home dashboard, click the collapse button. 
4. If you would like Account Growth to open by default when selecting Home from the navigation panel, you can click the heart icon located in the top right corner of the data card,  . If this is set as your favorite, the icon will be shaded red
 .
.
What Are the Growth Classifications?
Note: In the Account Growth main interface, you have the ability to rename these classification titles. They will default to GET, GROW, KEEP, and CHURN, but Admin Users can make changes to the names in the Admin Interface.
- Get – Brand new business that has $0 in the comparison time with > $0 in the current time frame
- Ex: $100 in the current time frame and $0 in the comparison time frame
- Grow – Additional incremental dollars, by any amount, in the current time frame compared to the comparison time frame
- Ex: $100 in the current time frame and $80 in the comparison time frame
- Keep – Flat growth that is the same amount in the current time frame as the comparison time frame
- Ex: $100 in the current time frame and $100 in the comparison time frame
- Churn – Loss of revenue, by any amount, in the current time frame compared to the comparison time frame
- Ex: $80 in the current time frame and $100 in the comparison time frame
Personalizing Your View with Options

Click the Show Options button to see the various configurations that you can set for Account Growth.
- Set the Time Frame that you wish to classify your Accounts for. We offer a clean, quarterly view to help keep this from being as granular as deals, but just granular enough to find the areas that you'll want to spend more effort on. When you close the options, the time frame will continue to display for easy understanding the next time you return.
- Set the Time Frame to Compare to for determining if your classifications will be GET, GROW, KEEP, or CHURN. We will display a rolling previous 3 years and 1 year into the future from the current quarter.
- Set the Calendar. This will only impact the Booked amounts and reads from the calendar type from revenue imports.
- The Pending Net Amount will only impact the Pending Amounts and reads from the Net Pending option on deals.
- The Budget Type allows you to view the budget for Bottom Up or Top Down. This control is only available for managers. Salespeople will always receive the Bottom Up view of the budgets.
- Scenarios allow you to quickly find potential Lost, New, Growing, or Churning business by doing the comparison of the Booked and Pending for you and showing rows that could match up.
- Likely Lost Business – Comparison Period > $0 AND This Period = $0
- Likely New Business – Comparison Period <= $0 AND This Period > $0
- Likely Growing Business – This Period > Comparison Period AND Comparison Period is a positive number <> $0
- Likely Churning Business – This Period < Comparison Period AND This Period is a positive number <> $0
- No Scenario – This is the default view and will show all rows
Click Run when you're done, and we'll get you exactly what you need.

Show Options

Budget Comparison Chart

A Budget Comparison chart will display at the top of the Account Growth page. It is designed to show you how you compare the Booked and Pending amounts of each classification to the overall Budget.
- Each classification is broken down into 2 similar, but slightly different colors representing the Booked and Pending aspect of GET, GROW, KEEP, and CHURN classifications. You can optionally hide the Booked or Pending amount via the checkbox options at the top of the chart. This will immediately update the chart and recalculate the value to budget.
- The Budget is also broken down into two similar, but slightly different colors to help identify your core Budget vs the New Business Budget as set via the *New Business placeholder option while Budgeting in Monarch.

Now that you are configured and have an idea of where you stand against your budget, it's time to start classifying your Accounts. We break this down by Media Type, Account, Salesperson, and Outlet. This should reflect the Accounts that you would see on the Account List, but within the Account Growth view.
By default, all accounts will be under the Keep (flat growth) column.
Reclassify each account by clicking on the double arrow button and then choose the classification that you wish to change to. We recommend that you compare the amount in the Booked and Pending columns to the same period from last year (the last 3 columns) in order to make a better decision.

Your dollars will only appear in the column that each row corresponds to. For example, the $1100 Booked and $600 pending in the example are entirely attributed to GET. However, another row for the same Account and Salesperson but for the KMOO Outlet can have dollars in an entirely different classification if desired.
When you reclassify an account, then the chart, totals, and placement of the dollars will immediately change. There is no need to refresh this page for the logged in user. However, if a Salesperson and a Manager are both logged in at the same time and that salesperson makes changes, it will not automatically refresh for the Manager. The manager will need to manually refresh their page to see the changes update.
Filters for Media Type, Account, Salesperson, and Outlet will also help you to manage your focus and weed out unnecessary items that you may not be directly responsible for or wish to classify at this time.
Other Controls
Paging - Your Account Growth is set to 15 accounts per page. This is something we may consider adjusting up or even allowing you to personalize further, but we wanted to roll out with a smaller number to gauge the feel of the performance on the page.

 New Accounts where the current owner is the first owner will see a “seedling” icon next to the row indicating the salesperson might be inexperienced with this account and still learning about them. This will display for the first 90 days an account is owned by the first AE and hovering over it will display the creation date.
 Accounts that were reassigned to the current owner within the last 90 days will display this “reassignment” icon indicating the salesperson might be inexperienced with this account and still learning about them. Hovering over the icon will display when the account was reassigned and who reassigned it.
Can I automate some of this?
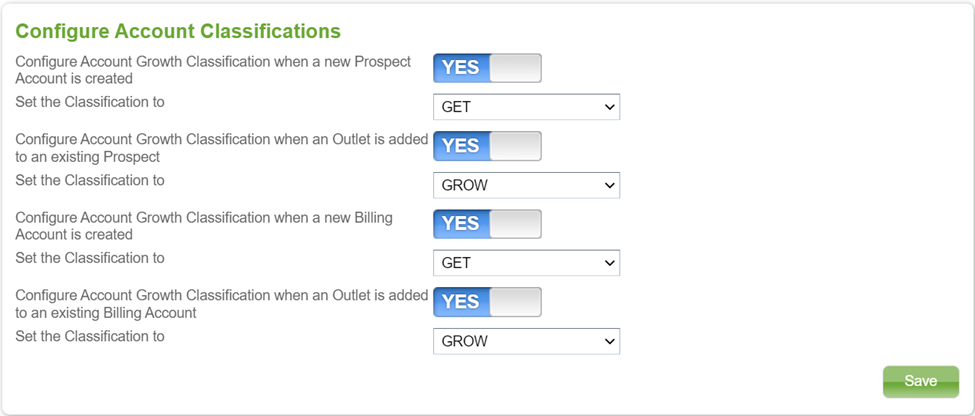
If you desire, Monarch can automate classifying accounts in 4 different scenarios.
- New Billing Account Created
- New Outlet Added to an Existing Billing Account
- New Prospect Account Created
- New Outlet Added to a Prospect Account
If one of these events occurs, you can have Monarch automatically assign a chosen classification to that row within Account Growth. We highly recommend you give the New Account scenarios a try as it will save a lot of time unless the desire is to have the sales team review everything or if your classifications are not as cut and dry.
These can be defined by an admin from the Settings page and will create the classification for all existing Account Growth Periods.
Can I see who made the changes and when?
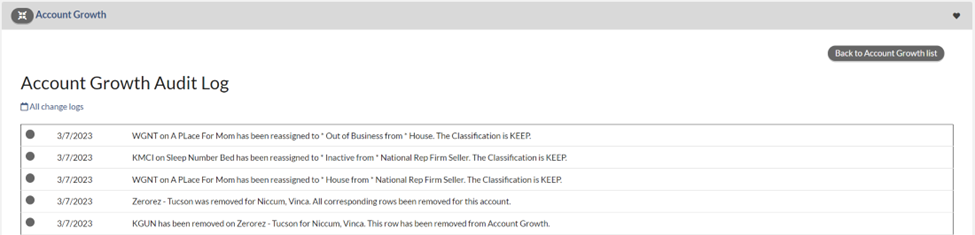
We offer a change log which is accessible from the Show Change Log button in the upper right of the Account Growth expanded view.  Clicking on this will display the changes for the filtered view of your Account Growth. You can choose to show all logs (default) or set to a specific date if you already know a specific change was made on an exact date. When you’re done, click the Back to Account Growth List button in order to go back to the Account Growth entry screen.
Account Pulse with Account Growth
If you have our Account Pulse AI plan you will also be seeing the Latest Pulse Score column as well as our recommendation for classification within Account Growth!
 The Latest Pulse Score column lets you see what the Account scored in Account Pulse on its last run as well as a way to filter to a specific Account Pulse score. This should help you to better understand if an account is on a growth or churn path.
Additionally, when selecting your classification for Account Growth, we will recommend a classification of GET, GROW, KEEP, or CHURN based upon your latest Account Pulse scoring. This is indicated with the AI stars icon next to the name we recommend.
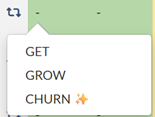
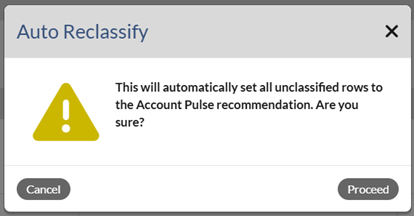
You can also use the classification option in the column header to classify all Account Growth rows with the Pulse suggestion. Any rows that do not have a Pulse Score will not be updated. Since the default Account Growth value is “KEEP”, any rows that are not currently “KEEP” will also be ignored and not be updated so that you can freely use this automatic option at any time during your Account Growth process. Any rows A warning message will appear if you attempt to automatically classify all rows.
Please click on the below article if you would like to learn more about how we calculate the Account Score in Account Pulse.
Monarch - Account Growth – How to Score an Account with Account Pulse
Adding Quick Deals - You can add a Quick Deal by selecting the the dollar sign icon in front of your accounts.
If there is pending for the timeframe in view, the dollar sign icon will be green:

If there is no pending for the timeframe in view, the dollar sign icon will be gray:

Do a "Left" click on the gray dollar sign icon to launch the Deal Quick Add window, which will allow you to create a new deal for the account.
- The Outlets and Revenue Types by default will populate based upon your deal preferences in My Profile.
- The Due Date will be set 1 month ahead
- The first Sales Stage will be selected.
- The Deal Status will be set to Open-Pending.
Quick Deal Edits
Once a deal/pending dollars are added to your account, you can "left" click on the green dollar sign icon to show you all of the deals that make up the pending value and for what amount. You can also click $ Add Deal from this list to add a new Quick Deal:

You can do a quick edit by clicking on the pencil icon:
This will utilize the Quick Deal experience and will allow you to edit the common fields of a deal quickly. This will not pull all the deal's fields for you. You can click on the View Full Profile button in the Deal Quick Edit window to save all your current changes and be directed to the Deal Details Page.

Other Important Notes
- When Merging and Unmerging, the Merge From will take on the Merge To’s categorization when the only difference between rows is the item merged. For example
- I have an Account of “McDonald’s” with a Salesperson of “Jane Smith” with an Outlet “WAAA”. The classification is “KEEP”.
- I also have an Account of “McDonalds” with a Salesperson of “Jane Smith” with an Outlet “WAAA”. The Classification is “GROW”
- My admin merges “McDonald’s” into “McDonalds”. The previous records of for “McDonald’s” will now be merged down into a single row “McDonalds” with “GROW” as my classification.
- Pending and Budgets Updates every 2 hours.
- Reassignments should be reflected in near real time.